
Halloween Witch Hat Cookies

These adorable witch hats are easy to make and fun for Halloween parties and gatherings! Made with a homemade chocolate cookie and Hershey Kisses they are tender, delicious, and festive!
** Don’t have time for homemade? Scroll to the bottom of this post for instructions for making these with Oreos! **
*For your convenience this post includes Amazon shopping links, I earn a small commission at no cost to you.*
Halloween is such a fun time for parties and get togethers! I love creating fun and delicious treats that are as festive as they are tasty.
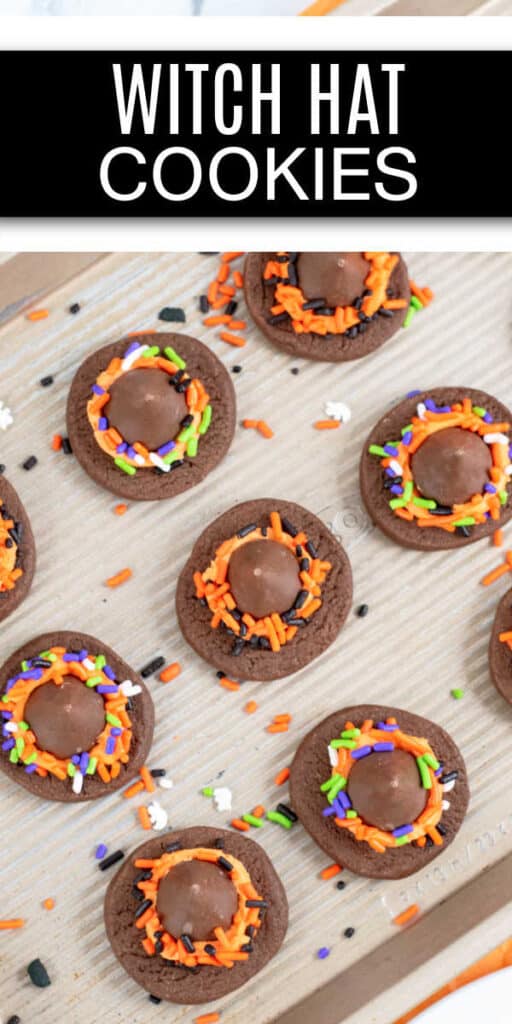
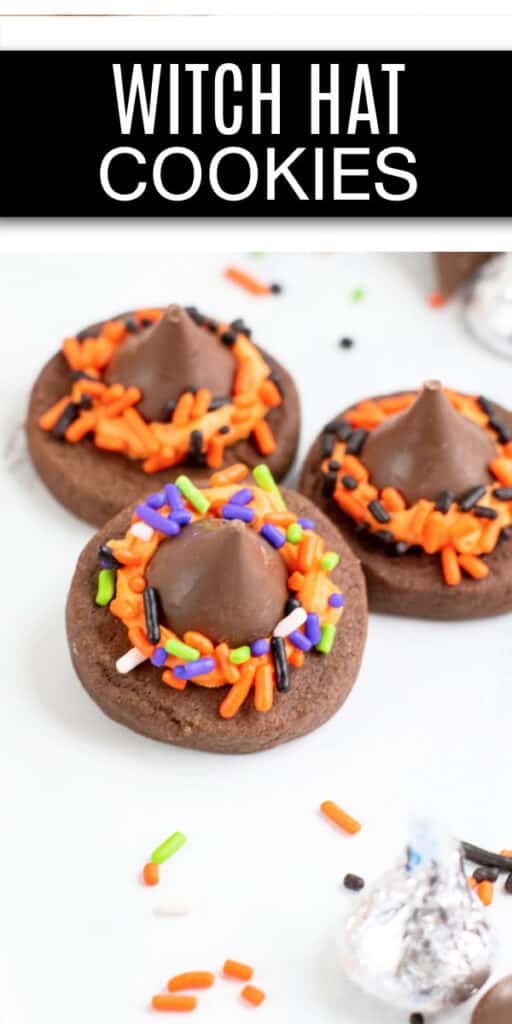
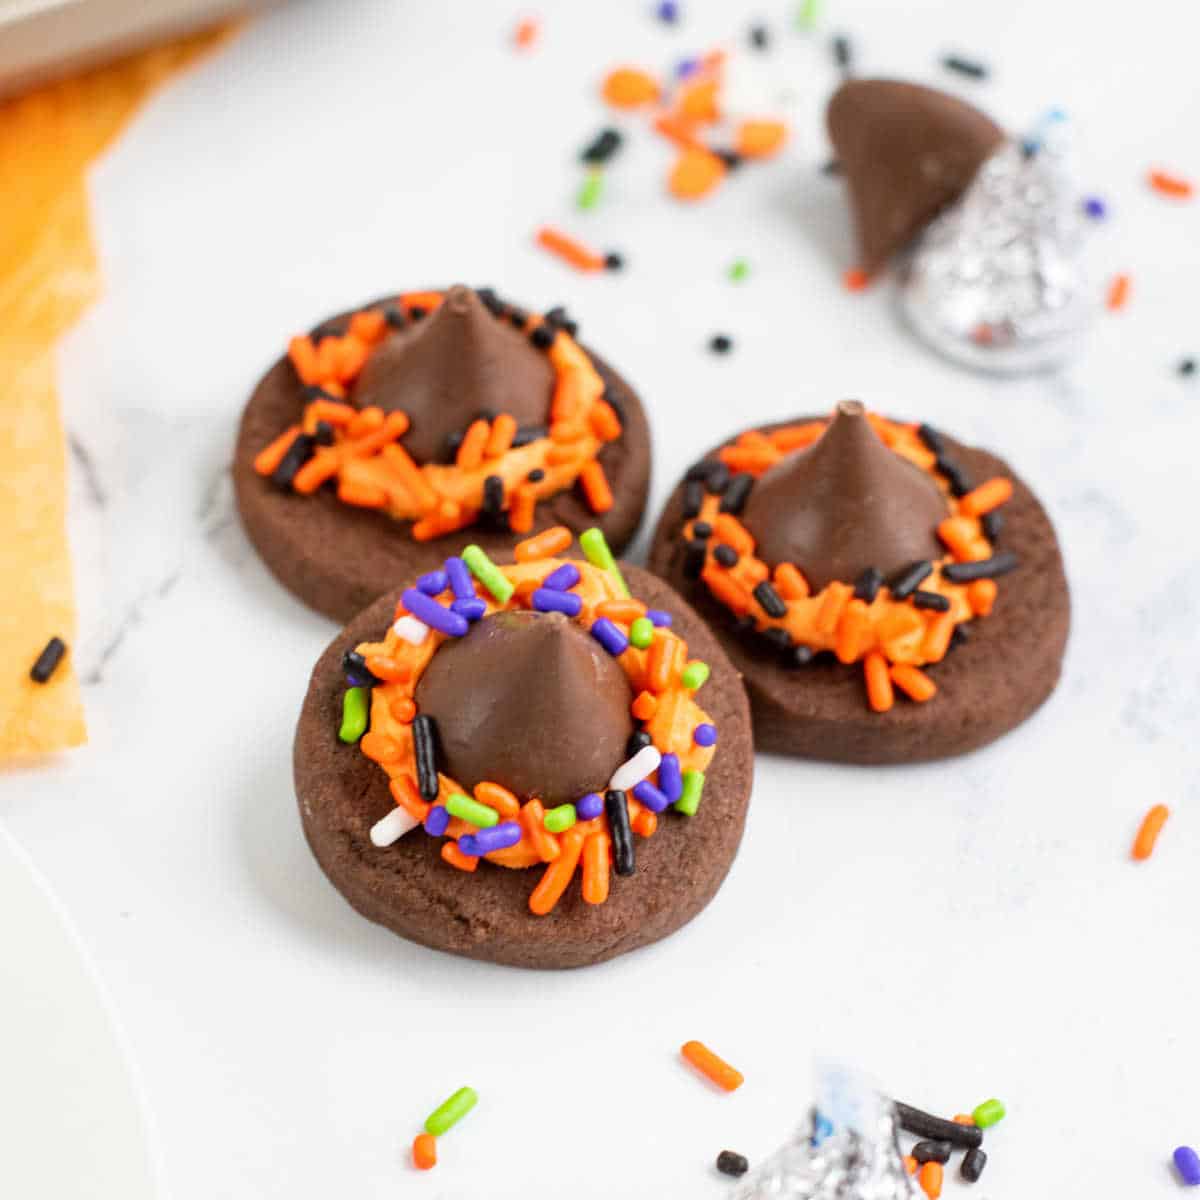
These witch hat cookies are one of my favorite Halloween cookies, they are created by making a tender, buttery, chocolate sugar cookie, and topping it with a Hershey’s kiss. I love to use frosting in fun colors and add sprinkles to add to the fun!
Now, I’m a fan of homemade cookies and frosting but you can also make these cookies with store bought cookies and frosting. See the FAQ & Tips at the bottom of this post for how to do it!
What I love about these cookies is that they are super easy to make, they are fun to decorate with the kids, and everyone loves them!
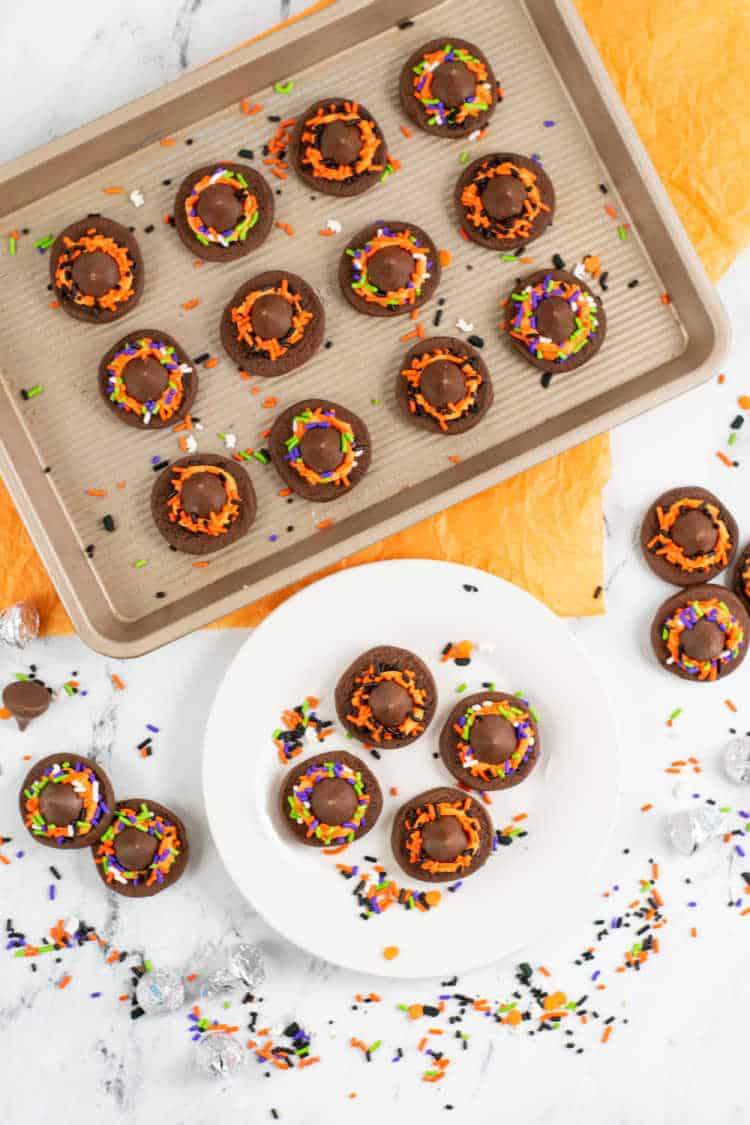
These are the cutest Halloween treat and they transport beautifully for things like class parties or family gatherings.
Halloween Witch Hat Cookies

Ingredients
- For the Cookies
- 2 Cups Flour
- 2 Tbsp Corn Starch
- ½ tsp Salt
- ¾ Cup Cocoa Powder
- 1 Cup Sugar
- 1 Cup Butter softened
- 1 Egg
- 2 tsp Vanilla
- For the Frosting
- 8 Tbsp Butter softened
- 2 Cups Powdered Sugar
- 1 ½ Tbsp Heavy Cream
- ½ tsp Vanilla
- Orange Gel Food Coloring
- 60- Hershey’s Kisses
- Halloween Sprinkles
Instructions
- The first thing we’re going to do is bake the cookies that are the base for these witch hats. These are a simple chocolate slice and bake ice box cookie that makes a delicious base. They are also super easy to make!
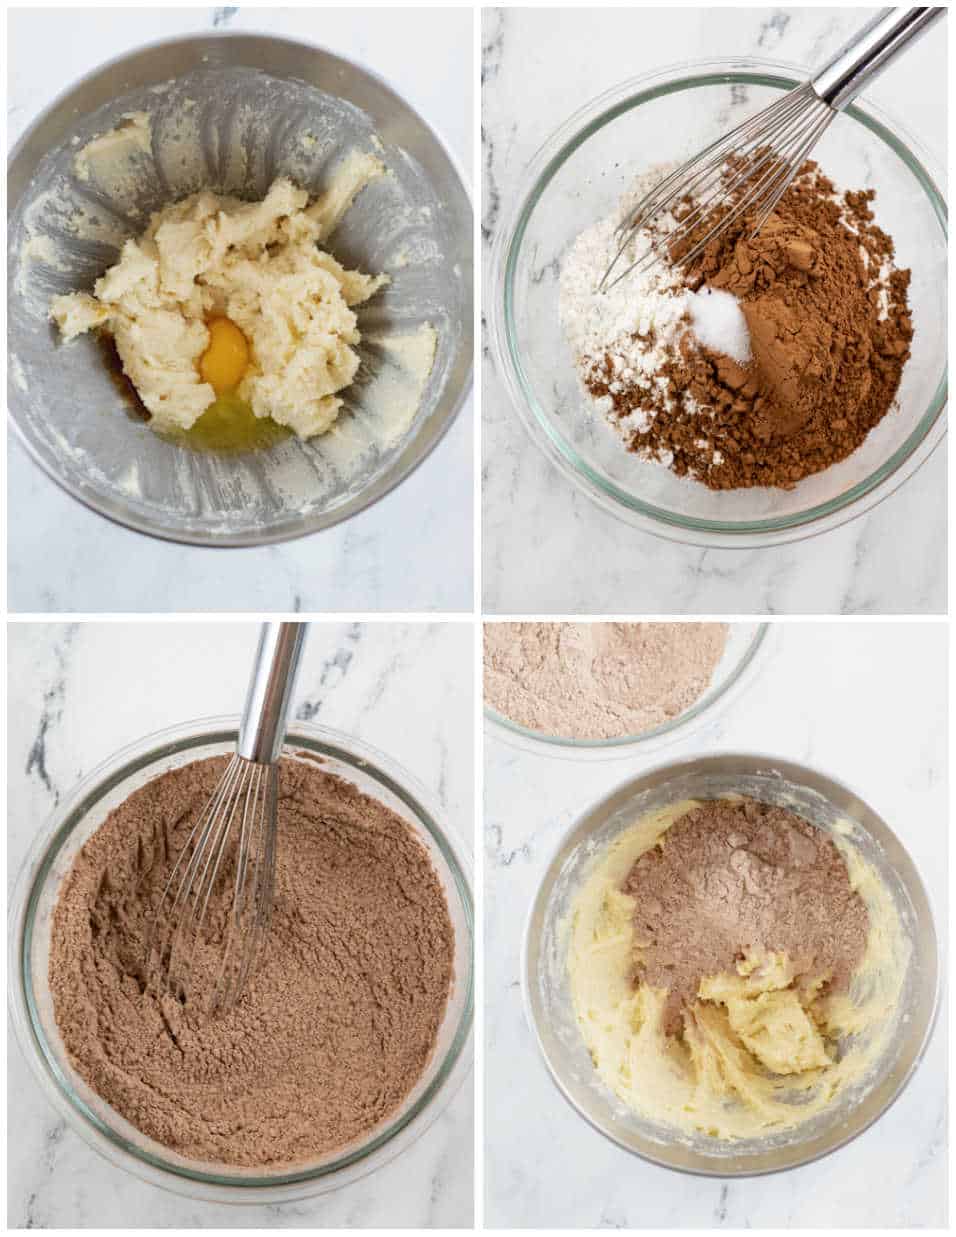
- First you’ll need to whisk together flour, corn starch, cocoa powder, and salt in a medium bowl.
- Then with an electric mixer cream butter and sugar until light and fluffy. Add in the egg and vanilla and continue to mix until well blended.
- Add in flour mixture gradually mixing well after each addition
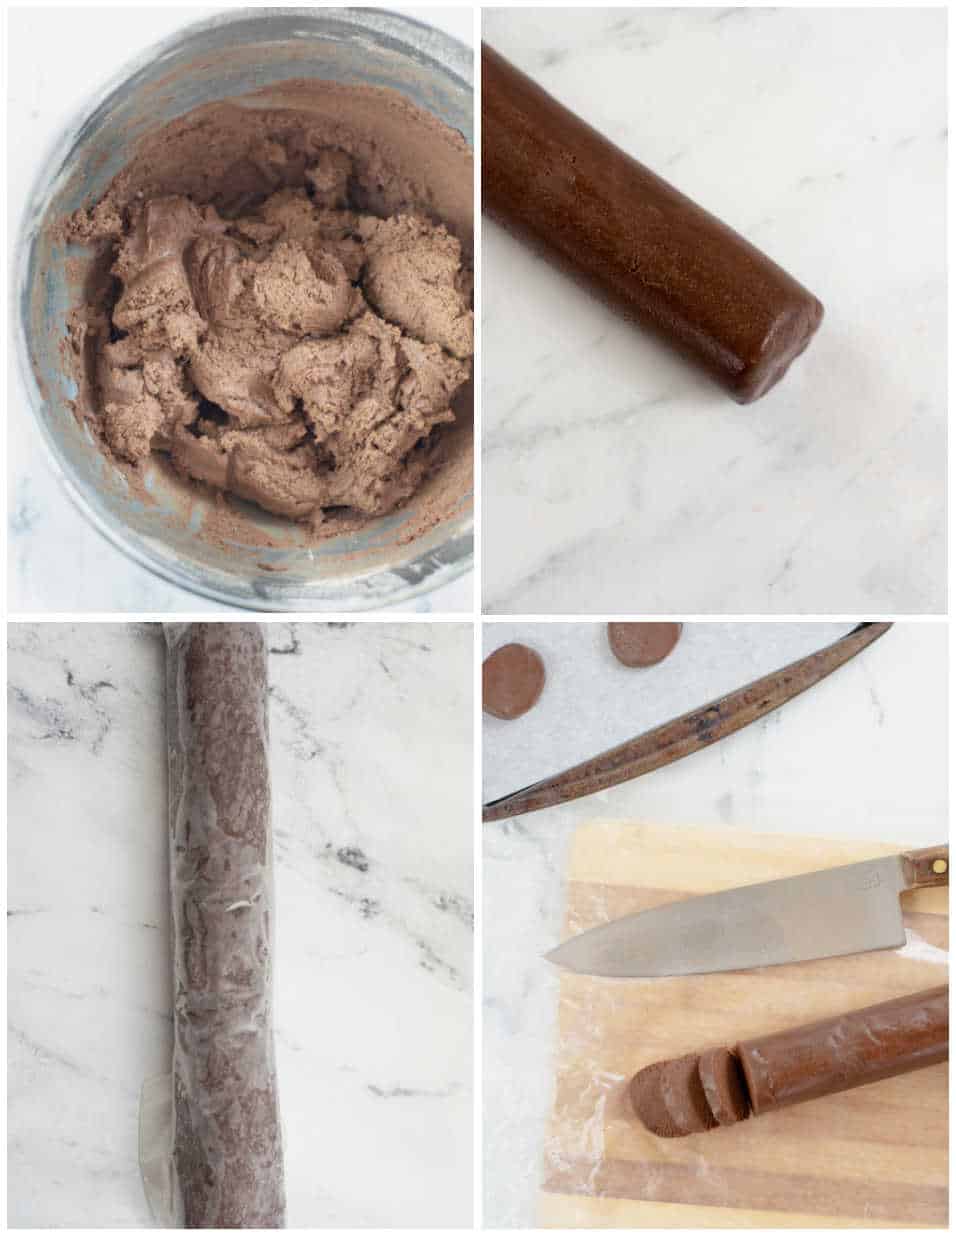
- Now remove the dough from the bowl and roll into a log with a diameter of about 1 ½ inches. I like to do this on parchment or wax paper to help keep it from sticking. Then wrap the dough log in parchment or wax paper and refrigerate for at least an hour.
- Once the dough has chilled it is time to bake the cookies.
- First preheat the oven to 350. I like to line my baking sheet with parchment paper, but it is ok if you don’t.
- Now using a sharp knife slice the dough into ¼- ½ inch slices and place on a baking sheet.
- Bake for 8-12 minutes or until set, They’ll look dry around the edges and a little shiny in the middle. You don’t want to overbake them!
- Remove from oven and allow to cool on the baking sheet for 2-3 minutes, remove to cooling rack to cool completely.
- You’ll want the cookies to be completely cooled before adding the frosting and Hershey’s kisses so make sure that you give them plenty of time to cool.
- When you are ready to decorate the cookies you’ll want to make the frosting.
- In the bowl of an electric mixer mix butter until light and fluffy. Add in powdered sugar and heavy cream a little at a time mixing between each addition until it is all incorporated. Add in vanilla, and orange food coloring and mix thoroughly. Add additional food coloring if needed to achieve desired flavor. If you want to make multiple colors of frosting than you’ll want to add in the vanilla then separate the frosting into smaller bowls and add your food coloring.
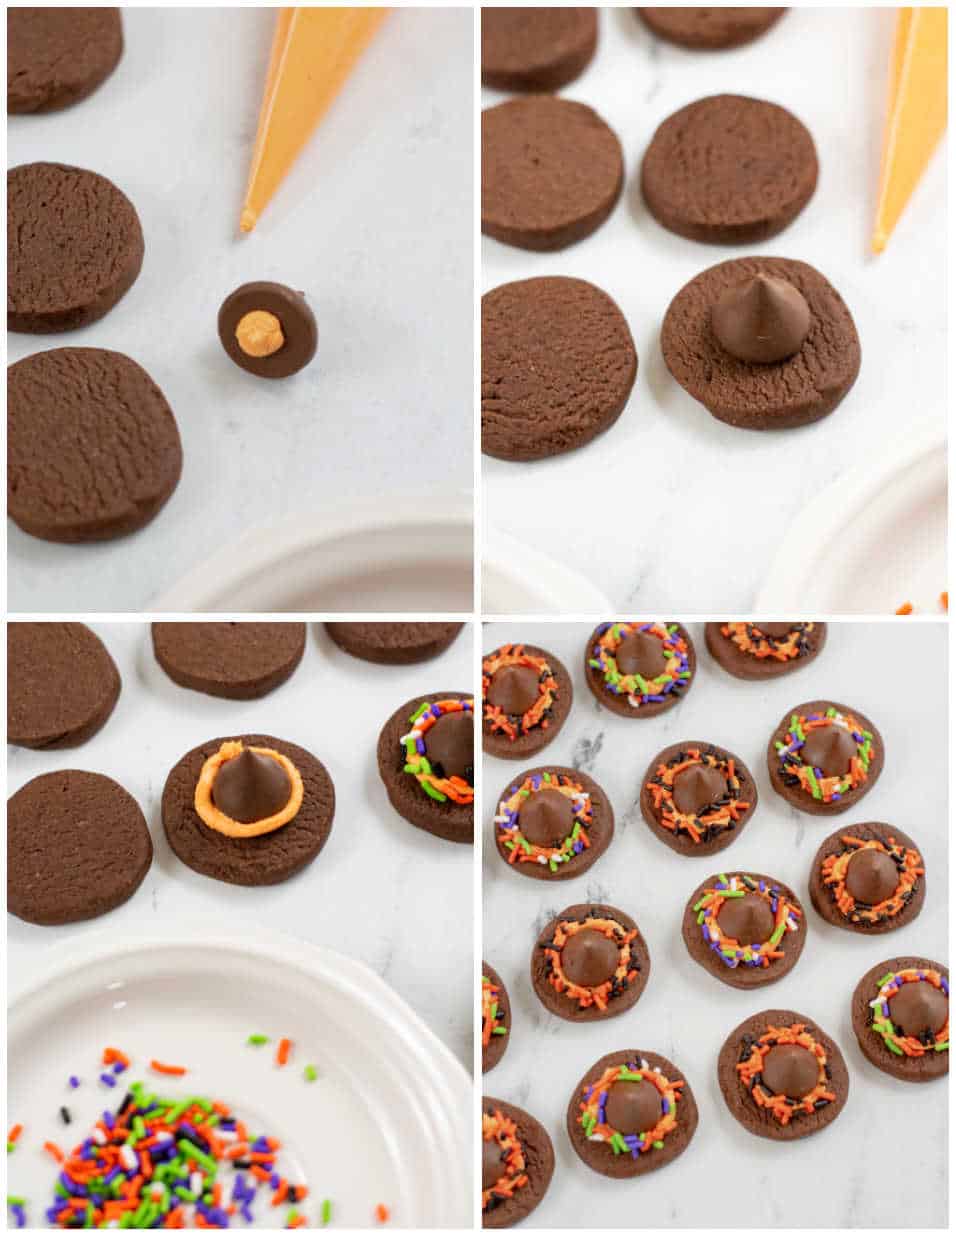
- Unwrap your kisses to get ready to assemble, this makes the assembly go much faster!
- Fill a piping bag with your frosting and cut off the tip to create a small hole (or use a small metal tip) pipe a small dot of frosting on the bottom of an unwrapped Hershey’s kiss. Place it in the center of a cookie and press gently. Pipe frosting around the edge of the Hershey’s kiss and then decorate it with sprinkles. You want to add the sprinkles while the frosting is fresh so that they’ll stick!
- Repeat until all cookies are decorated.
- Store in an airtight container until ready to serve.
- Other Posts You’ll Love
- Graveyard Pudding Dirt Cups
- Jack o’ Lantern Mini Cheesecakes
- Over 100 Halloween Desserts & Sweet Treats

Ingredient Checklist-
Get the exact measurements in the printable recipe card at the end of this post.
For the Cookies
Flour– I always use all purpose flour
Corn Starch– This helps the cookies have a nice soft texture.
Salt– I like to use sea salt, but regular table salt
Cocoa Powder– Make sure you have fresh cocoa powder for the best flavor.
Sugar– I like to use cane sugar, but regular white sugar works perfectly
Butter– I like to use unsalted butter for baking but salted is ok too. You’ll want it to be softened to room temperature before you get started.
Egg- I use large eggs
Vanilla- Make sure you have real vanilla it is way better than imitation!
For the Frosting
Butter – I like to use salted butter for frosting but unsalted works too. If you use unsalted you’ll probably want to add a pinch of salt. Make sure it is softened before you make your frosting.
Powdered Sugar– This makes the frosting nice and fluffy!
Heavy Cream – This helps make the frosting nice and creamy.
Vanilla– Real vanilla is a must!
Orange Gel Food Coloring– Gel food coloring makes nice vibrant colors without having to use a lot. You can also use other colors if you’d like!
60- Hershey’s Kisses– I like to use regular kisses but if you’d like to use the striped “hugs” you can use them too!
Halloween Sprinkles– Any sprinkles that you’d like to use to dress these up will work.
Want to Save This Recipe?
Here’s how to make these Witch Hat Cookies-
The first thing we’re going to do is bake the cookies that are the base for these witch hats. These are a simple chocolate slice and bake ice box cookie that makes a delicious base. They are also super easy to make!
First you’ll need to whisk together flour, corn starch, cocoa powder, and salt in a medium bowl.
Then with an electric mixer cream butter and sugar until light and fluffy. Add in the egg and vanilla and continue to mix until well blended.
Add in flour mixture gradually mixing well after each addition.
Now remove the dough from the bowl and roll into a log with a diameter of about 1 ½ inches. I like to do this on parchment or wax paper to help keep it from sticking. Then wrap the dough log in parchment or wax paper and refrigerate for at least an hour.
Once the dough has chilled it is time to bake the cookies.
First preheat the oven to 350. I like to line my baking sheet with parchment paper, but it is ok if you don’t.
Now using a sharp knife slice the dough into ¼- ½ inch slices and place on a baking sheet.
Bake for 8-12 minutes or until set, They’ll look dry around the edges and a little shiny in the middle. You don’t want to overbake them!
Remove from oven and allow to cool on the baking sheet for 2-3 minutes, remove to cooling rack to cool completely.
You’ll want the cookies to be completely cooled before adding the frosting and Hershey’s kisses so make sure that you give them plenty of time to cool.
When you are ready to decorate the cookies you’ll want to make the frosting.
In the bowl of an electric mixer mix butter until light and fluffy. Add in powdered sugar and heavy cream a little at a time mixing between each addition until it is all incorporated. Add in vanilla, and orange food coloring and mix thoroughly. Add additional food coloring if needed to achieve desired flavor. If you want to make multiple colors of frosting than you’ll want to add in the vanilla then separate the frosting into smaller bowls and add your food coloring.
Unwrap your kisses to get ready to assemble, this makes the assembly go much faster!
Fill a piping bag with your frosting and cut off the tip to create a small hole (or use a small metal tip) pipe a small dot of frosting on the bottom of an unwrapped Hershey’s kiss. Place it in the center of a cookie and press gently. Pipe frosting around the edge of the Hershey’s kiss and then decorate it with sprinkles. You want to add the sprinkles while the frosting is fresh so that they’ll stick!
Repeat until all cookies are decorated.
Store in an airtight container until ready to serve.

FAQ & Tips-
How to make these with store bought cookies & frosting-
These cookies are super fun for parties but sometimes you just don’t have time to bake cookies and make homemade frosting! Here’s the good news! These are super easy to make with a few store bought items.
For the cookie you’ll want to use Oreos (or another chocolate sandwich cookie) or Fudge Stripe Cookies, or any other round chocolate cookie (have a stash of Girl Scout Thin Mints??)
For the frosting you can purchase a jar of frosting, color it as desired, and place it in a piping bag. Or you can buy tubes of decorator frosting and you’re ready to just squeeze it & go!
Follow the directions above for cookie assembly, attach the kisses to the cookies and decorate! Easy peasy!
Using store-bought supplies makes this a super easy and fun recipe to make with kids!
Don’t overbake the cookies- Because these cookies are chocolate it can be hard to tell when they are done. Since there are no golden brown edges you might have trouble telling. I like to do a test batch with just a couple of cookies to figure out the perfect time for my oven, that way you get perfect cookies every time!

I can’t wait to make your wonderful Halloween treats with my Grandsons! Thank you for your brilliant recipes!