
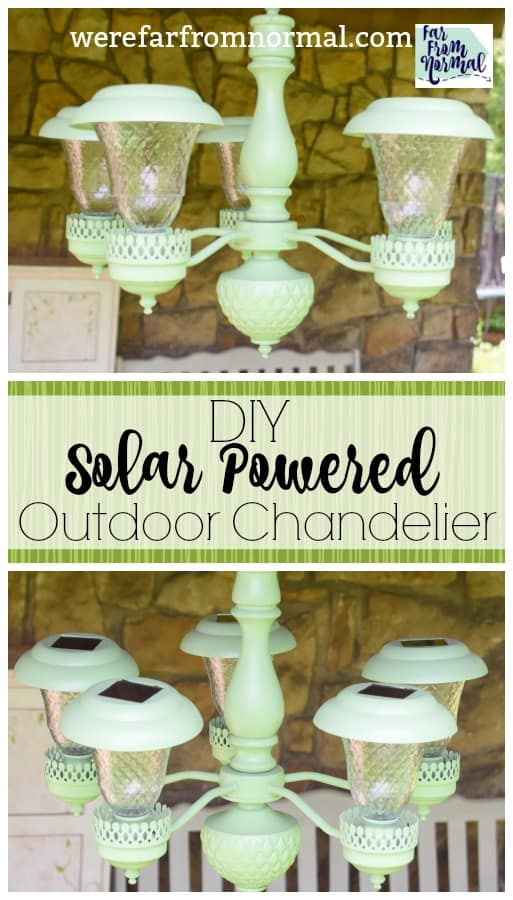
DIY Outdoor Solar Chandelier (an easy up-cycle project!)
Are you looking for a great way to add light and dress up your outdoor living space? Up-cycle an old light into an awesome outdoor solar chandelier! With just a little paint, solar lights and some creativity you can have a great new addition to your patio or deck!
A couple of months ago I went to a charity yard sale for our county dog pound. I donated a ton of stuff we didn’t need anymore, and then of course had to attend the sale to make sure there wasn’t anything I couldn’t live without.
Now super hubby didn’t want me to go unattended because they were going to have dogs from the pound there for people to meet and adopt… He knew it would be a challenge for me not to come back with ALL the dogs. So I had to promise not to come back with a new furry friend.
Instead I came back with this-
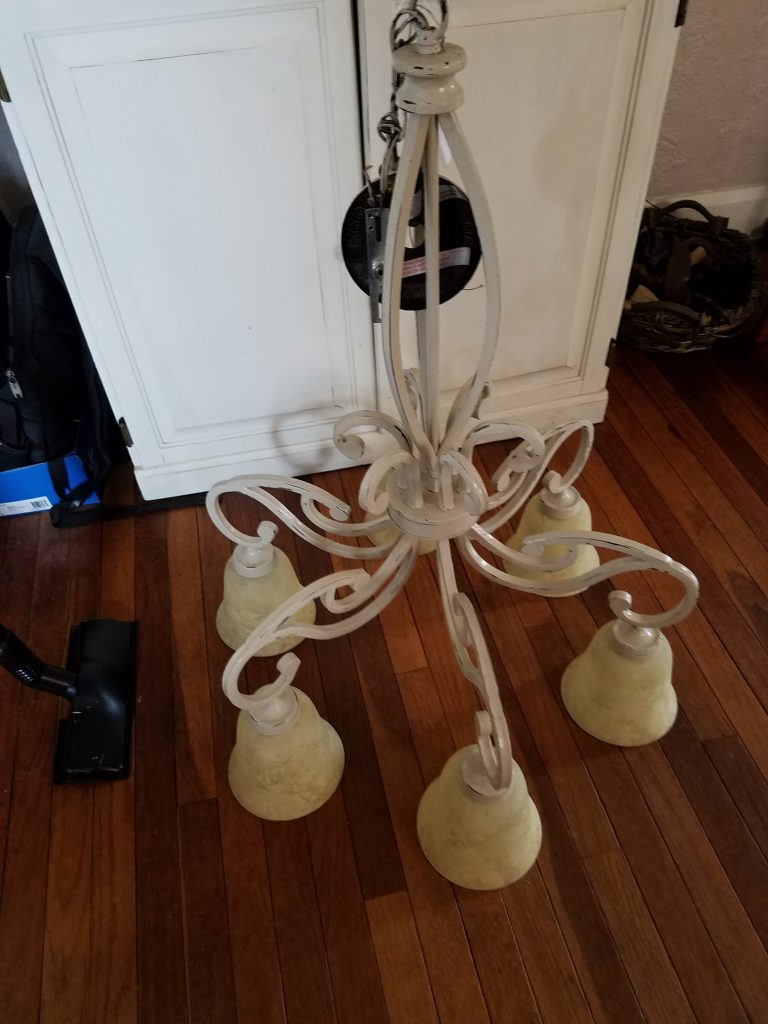
A gigantic new light for my tiny dining room that was way too long and way heavier than the one we had… but it was only $20!!
Because my hubby loves me he altered the light to make it the right length and then hung it up for me. I’m pretty sure by the end of getting it hung he was wishing I had brought a dog home instead. Nevertheless, it looks beautiful with my freshly painted dining room table and it was a donation to help the shelter puppies!
When he took the old light down my husband had to cut its cords rendering it pretty much useless as a ceiling light. So I decided that it was going to become an awesome DIY project and get a new life as an outdoor solar chandelier!
Here’s how I made my outdoor solar chandelier!
Supplies-
Old ceiling light/ chandelier
Solar Lights
Spray Paint
Masking Tape
Liquid Adhesive
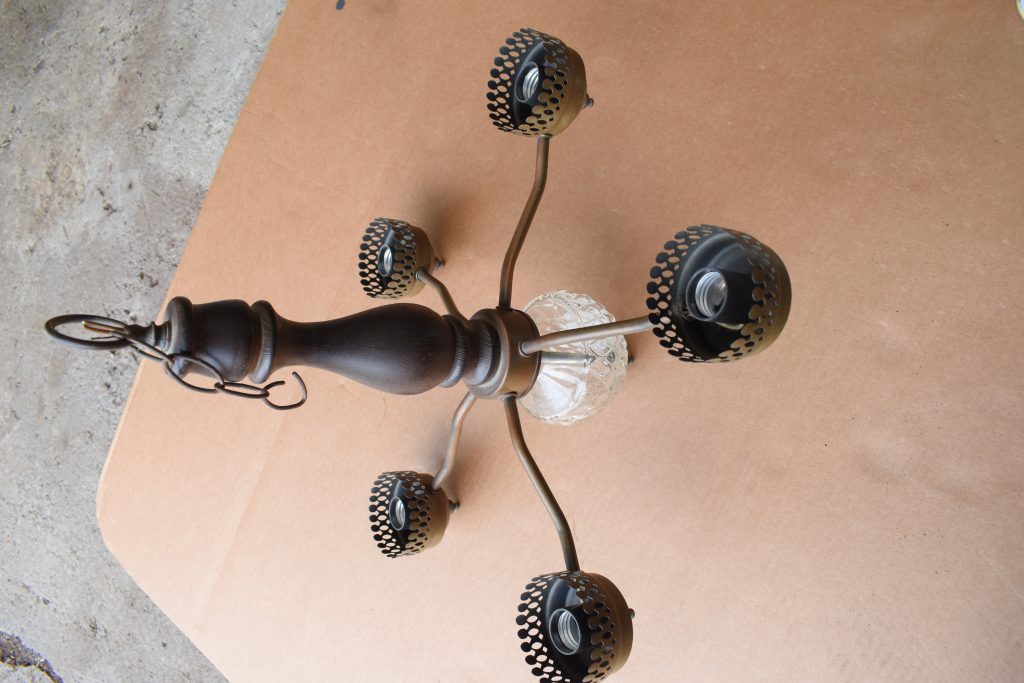
Now if you want to undertake a project like this for yourself you can use pretty much any old ceiling light and give it a makeover to become a great outdoor light. You’ll notice I left all of the light bulb sockets in the light, they are pretty much the perfect size for the base of a solar light. Look for a light with good bones, a look that will fit your decor, and that has nicely size places to insert your solar lights.
The first thing you’ll want to do is give it a good cleaning. Vacuum out its little nooks and crannies and wipe off any dust.
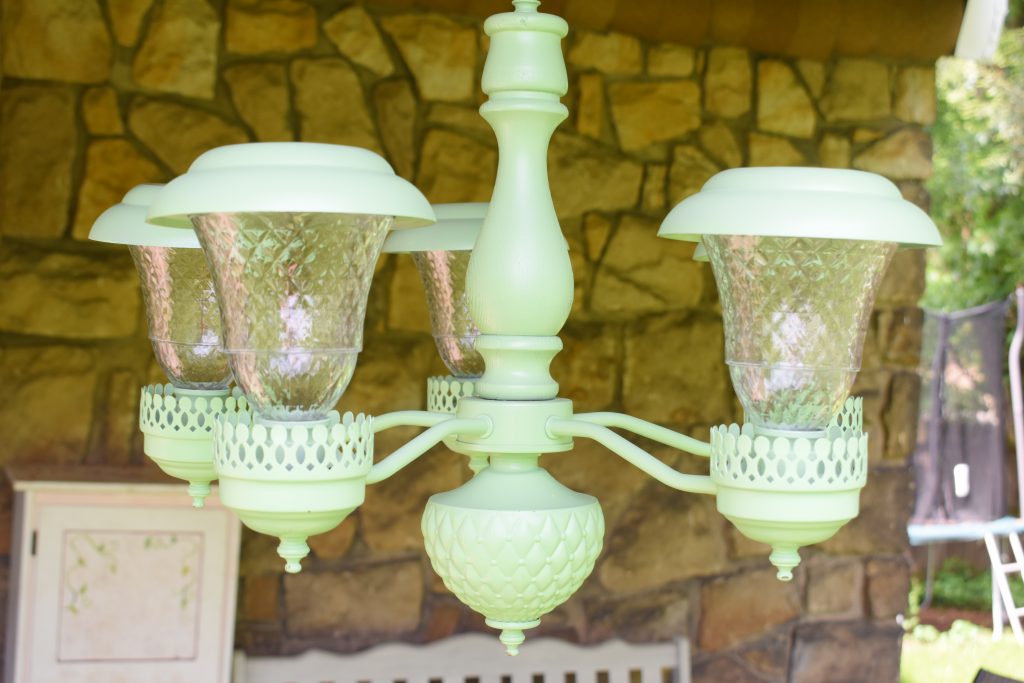
Now it’s time to paint!
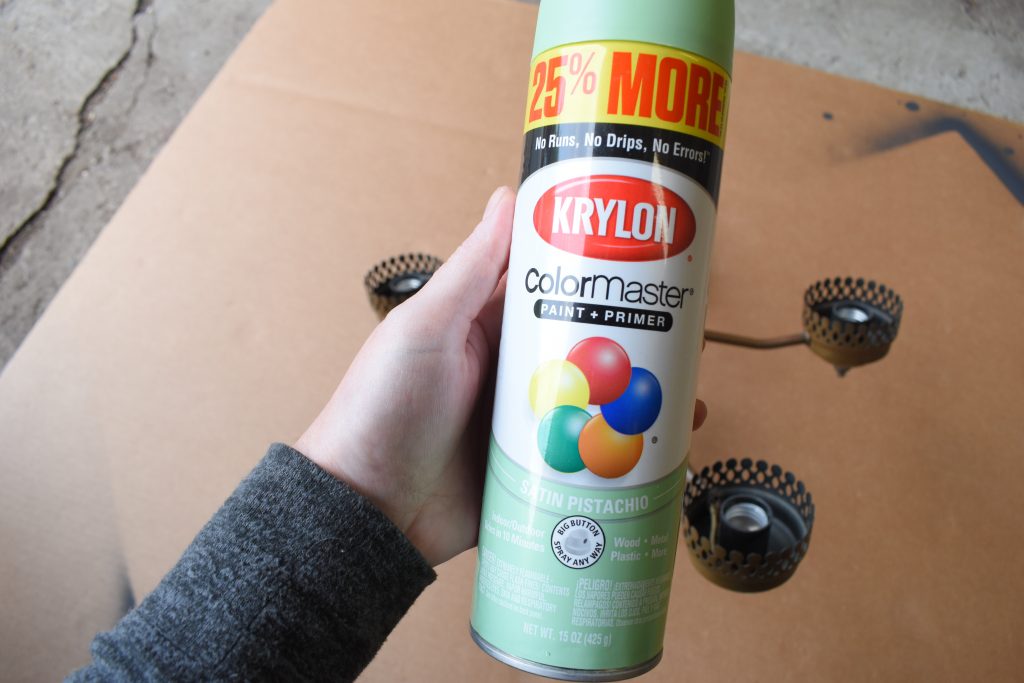
I used spray paint because it adheres to almost any surface and it’s easy to angle to get into all the little areas you’ll want to cover. Start with a very light coat, and then add additional coats letting it dry in between. Turn it as you go to make sure you don’t miss any spots. Because you won’t be using electric you can go ahead and paint all the inner workings of where the light bulbs go!
Want to Save This Recipe?

Once you have your light painted it’s time to move on to your solar lights. There are tons of solar lights available so you can find one that is the perfect size and shape to go with your chandelier. When you’re shopping for your lights you’ll want to make sure that they aren’t affixed to the post that goes into the ground because you won’t be needing it.
I got mine from Aldi, they came in a 6 pack, so I ended up with one extra. You can also get them on Amazon or at any home improvement store.
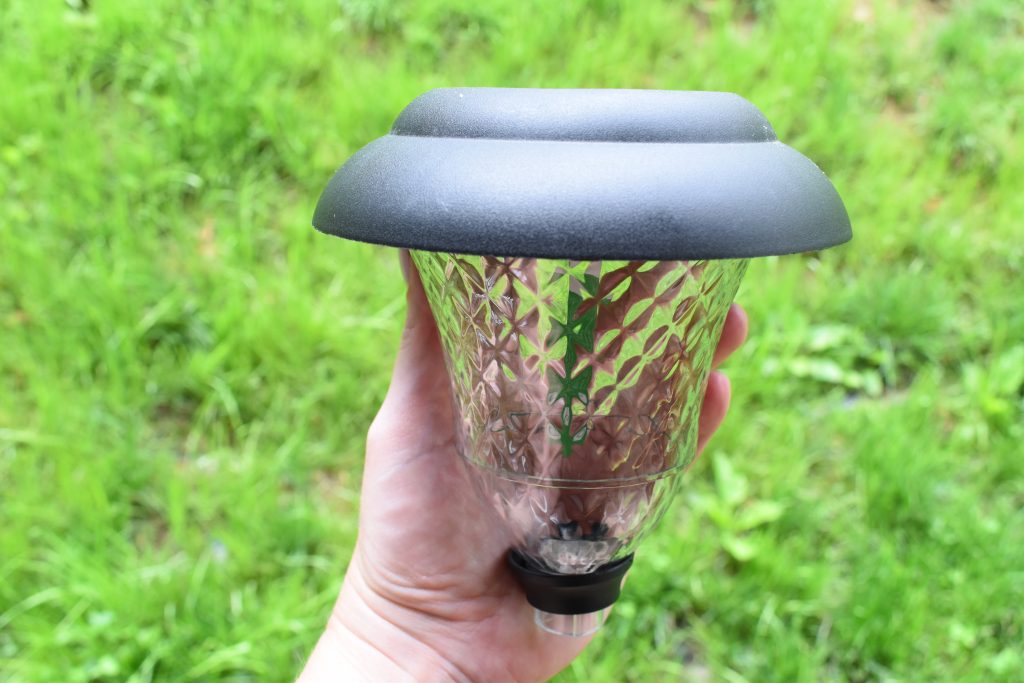
If you can disassemble your lights that makes them way easier to paint. Take them apart or tape off any areas you don’t want to be painted. Make sure to tape over the solar panel on the top!
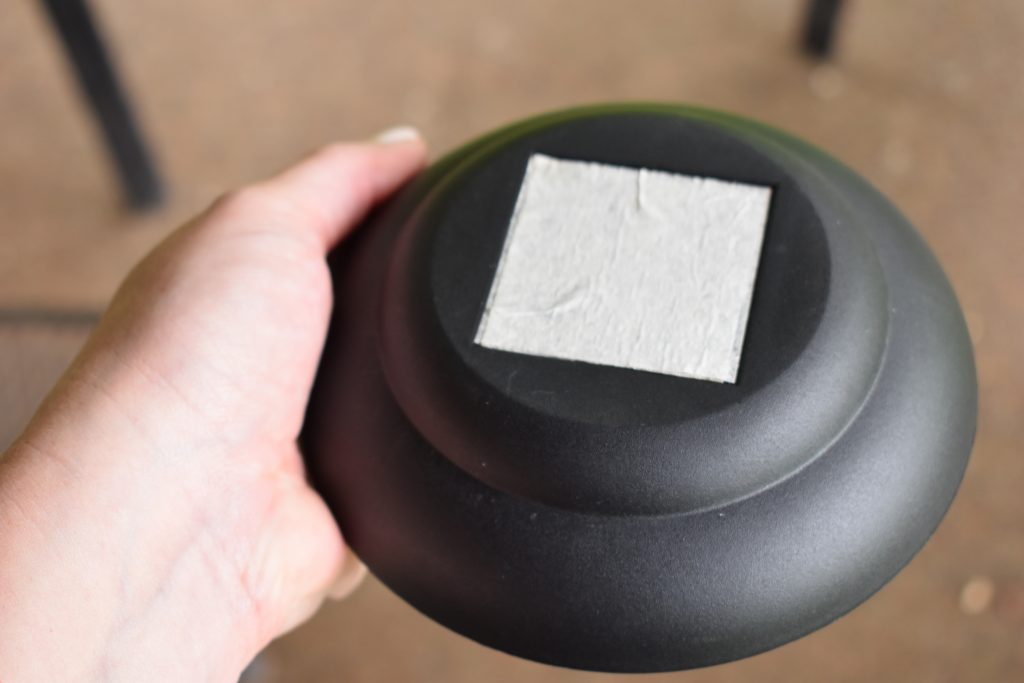
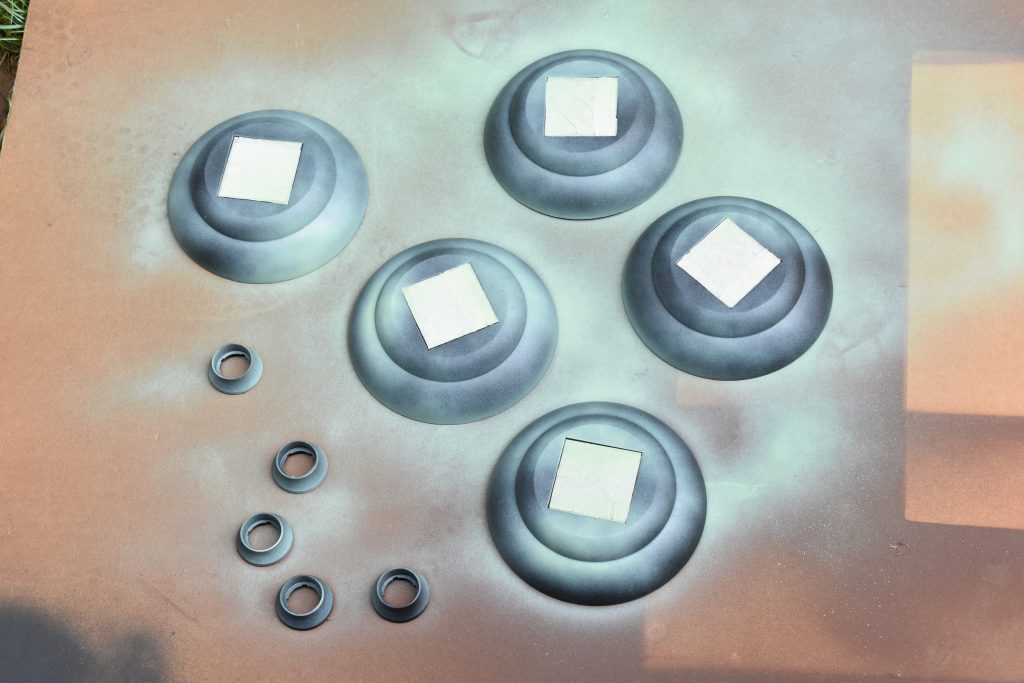
Lay all your parts out on cardboard, newspaper or another protected surface and spray paint them. Just like the light you want to start with a very light coat and the spray additional coats letting them dry in between. You’ll also want to flip them over and do both sides if the bottom will be visible when you put it all back together.
Once they’re all painted you can reassemble your lights and peel off any masking tape.

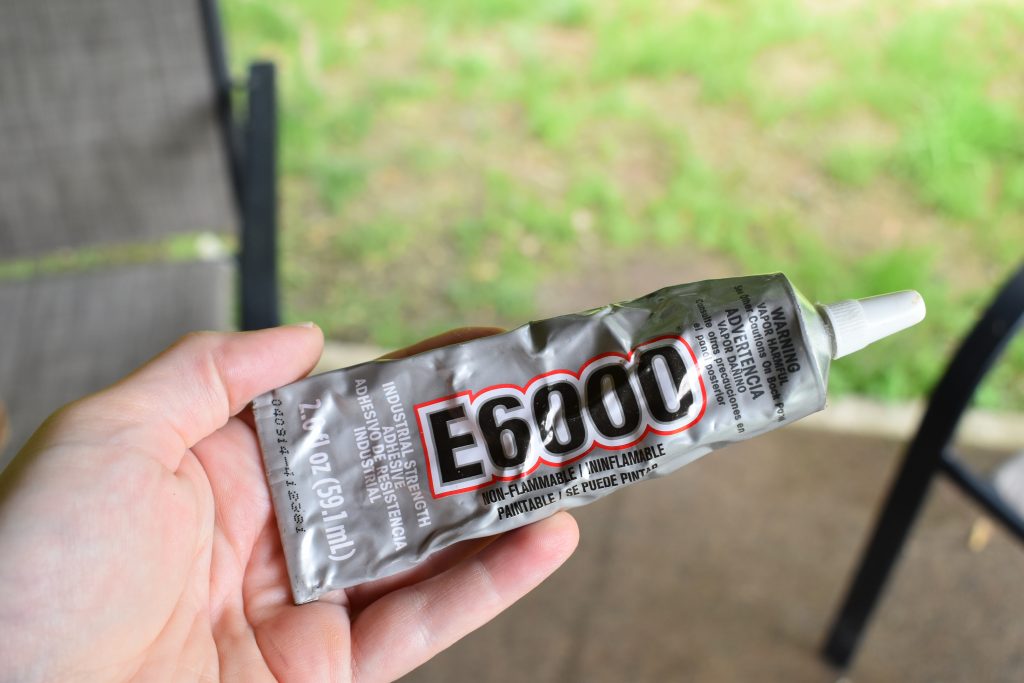
Now you want to secure your lights onto your chandelier. I find for outdoor projects a strong liquid adhesive is best since this will be in the sun a hot glue gun is probably not the best, but you could use super glue and it would probably work. I got this E6000 on Amazon and it has lasted me forever! A little goes a long way and it works really well.
Just put a small bead of your adhesive around the light bulb socket and then press your solar light in.
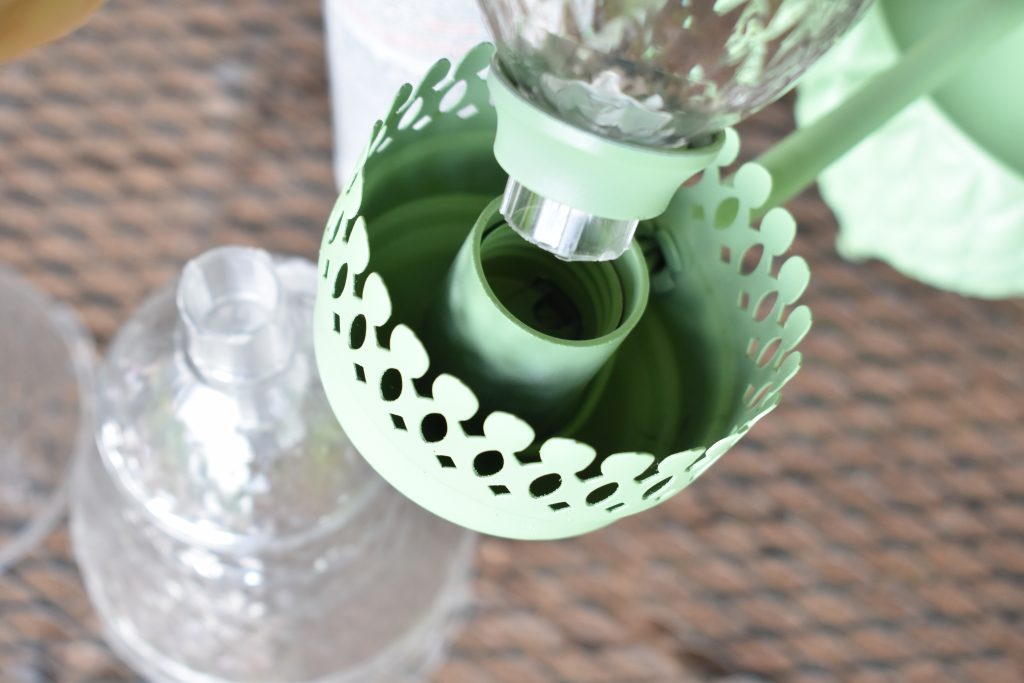
Once you have all your solar lights placed in your chandelier you’re finished! Let the adhesive dry well before hanging it outside so that it can stand up to the weather.
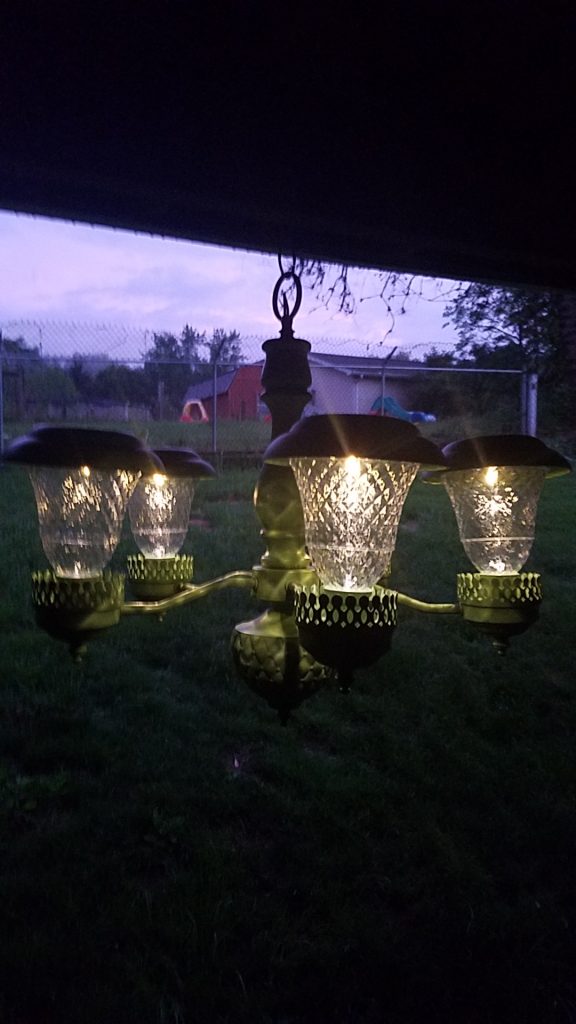
When the sun goes down your outdoor solar chandelier will light up and illuminate your outside space beautifully!


Very nice article. This is a very helpful article. It is very well presented.thank for sharing this article.
Hi Krista!
Love this DIY. Your choice of color is beautiful! I’d have to find a really good old chandelier, I’ve always been wanting an outdoor solar light 🙂 Thanks for sharing!
This is an amazing up cycling project. Its very creative! I would love to this as my next DIY project. I think it would be a great light up for our garage.
Wow, that’s really cool way to use those solar stakes. I love solar-powered gadgets, I just wish it was easier to determine the quality. Some will not even last for one season before you have to throw them away. I think it is mostly depending on the built-in battery type and capacity. Li-ion is preferred over Ni-cadmium.
Hi Krista, I absolutely love the look of this chandelier. I’ve been trying to find some solar lights for my outdoor eating area, I’m so excited to DIY this chandelier. Thanks for sharing!
I made one similar out of a hanging candle holder. First saw it in a store near Fredericksburg Texas. Wish I could show a picture here. Made it the same way. Love it.